Typical Workflow
To use the new 3D Smart Editing tools, users must be familiar with MicroStation 3D modeling concepts and the 3D surface and solid modeling tools.
The following describes the workflow for creation and maintenance of 3D features and starts with the initial creation and modification of a 3D solid. This workflow assumes that you have a working knowledge of MicroStation’s 3D modeling concepts and tools.
1. Create and modify the solid:
A simple 3D solid can be created using standard MicroStation solids modeling tools located in the Solids tab of the Map Modeling workflow. A simplified set of tools can be found in the Placement ribbon group of the Home tab. If needed, additional tools can be found in Modeling workflow.

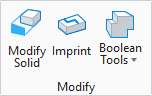
The initial solid can be modified with construction and manipulation tools to finish the design. This includes making use of push-pull technology to move or modify faces and vertices. The solid modeling modification tools are on the Solids tab of the Map Modeling workflow. A simplified set of tools are found in the Modify ribbon group on the Home tab. If needed, additional tools can be found in the Modeling workflow.

Note: For information on how to use the placement and modify tools, refer to MicroStation documentation.
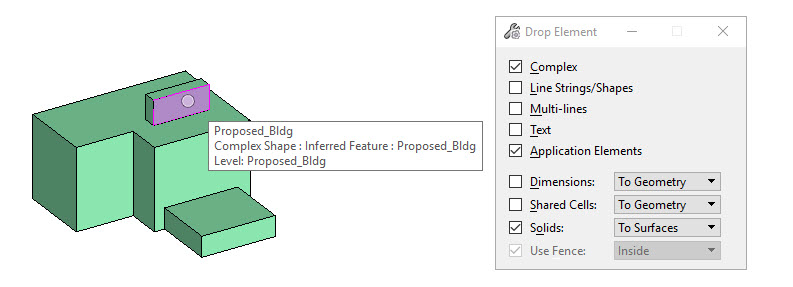
2. Drop to surfaces:
To prepare the 3D solid for conversion to a polygon collection, it must first be dropped to its constituent surfaces using the Drop Element tool. Ensure that the setting for Application Elements is enabled.
3. Promote to polygon collection:
Once dropped to surfaces, add the surfaces to a selection set or fence and use the Promote tool to create a 3D feature with the appropriate properties. The resulting 3D polygon feature is a polygon collection composed of adjoining polygons or faces. The attributes can be maintained and edited using the Edit Feature tool.
Editing geometry of polygon collection features:
Tools in the 3D Smart Editing ribbon group are provided when polygon collections require geometry edits.
- If needed, check for gaps between adjacent polygons using the Check Gaps tool.
- Convert an existing 3D polygon feature to a Smart Solid with the Create XFM Solid tool.
- Edit the geometry of the Smart Solid using 3D modeling modification tools.
- Restore the modified Smart Solid to its original 3D polygon feature using the Drop XFM Solid tool.

Note: If a feature definition includes Propagate locks, you may need to toggle the Graphic Group lock to perform edits to the geometry. For example, if Delete to Parent is enabled, then deleting a face may cause the entire feature to be deleted. In this case, turn the Graphic Group lock off.